
terraformはインフラの状態情報を持っておりデフォルトの場合、ローカル環境に terraform.tfstate というファイル名で保存されます。
デフォルトのファイル管理には、以下のデメリットがあります。
- 機密データの適切な管理が難しくなります。tfstateファイルにMySQLの管理パスワードやGitHubのToken などの情報が平文で出力されるので、それをそのままローカルPCに置いておくのは危険です。
- 複数メンバー間での状態情報の共有も複雑になります。例えばgitで管理しようとした場合、誰かがterraformを実行していないか、ちゃんと最新情報がコミットされているかなどを気にかける必要が出てきます。
対策として状態情報をローカル管理からリモート管理へ移行することで、排他ロックを含む共有が可能となり、以下のポイントでよりセキュアになります。
- 状態情報自体にアクセス制限をかけることで情報を守ることができる。(状態情報にパスワードなどがある場合、状態情報自体を機密データと扱うことが推奨されている)
- 履歴や監査ログからアクティビティを追跡できる。
- ディスクに保存されている情報を暗号化できる。
このリモート管理にはS3やGCSなど複数の方法が用意されています。(S3での管理についてはこちらの記事をご覧ください)
その一つであるTerraform Cloudは、2019年9月に5名まで無料になり少人数チームでの状態管理であれば、その無料枠内で利用できます。
では今回は標準のローカル管理している状態から、TerraformCloudでのリモート管理へ移行する流れでやってみます。
バックエンドの設定手順
ローカル管理の設定
まずデフォルトのまま、ローカルファイルとして管理してみます。
設定ファイルの作成
例としてEC2を1台構築する設定ファイルを準備します。
% cat main.tf
provider "aws" {
  region = "ap-northeast-1"
  profile = "default"
}

resource "aws_instance" "example" {
  ami           = "ami-0ce107ae7af2e92b5"
  instance_type = "t2.micro"
}
%
initコマンドで初期化
initコマンドで初期化します。これにより必要なプラグインがダウンロードされます。
% terraform init

Initializing the backend...

...

%
applyコマンドでインフラ作成
applyコマンドで実際に作成します。これによりAWS上にEC2が1台構築されます。
% terraform apply

An execution plan has been generated and is shown below.
Resource actions are indicated with the following symbols:
  + create
...

Plan: 1 to add, 0 to change, 0 to destroy.

Do you want to perform these actions?
  Terraform will perform the actions described above.
  Only 'yes' will be accepted to approve.

  Enter a value: yes

...

%
apply後、ローカルに状態情報が記載された terraform.tfstate が作成されます。
% ls
main.tf			terraform.tfstate
%
% cat terraform.tfstate
{
  "version": 4,
  "terraform_version": "0.13.3",
  "serial": 1,
  "lineage": "xxxx-xxx-yyyyy-yyyyy-zzzzzz",
  "outputs": {},
  "resources": [
    {
      "mode": "managed",

...
リモート管理へ移行
では上記で作成したローカルにある状態情報をリモート管理へ移行します。
Terraform Cloud アカウント登録

へアクセスし、メールアドレス、パスワードなどを登録します。
登録したメールアドレスに確認用リンクが送信されるので、そのリンクをクリックします。
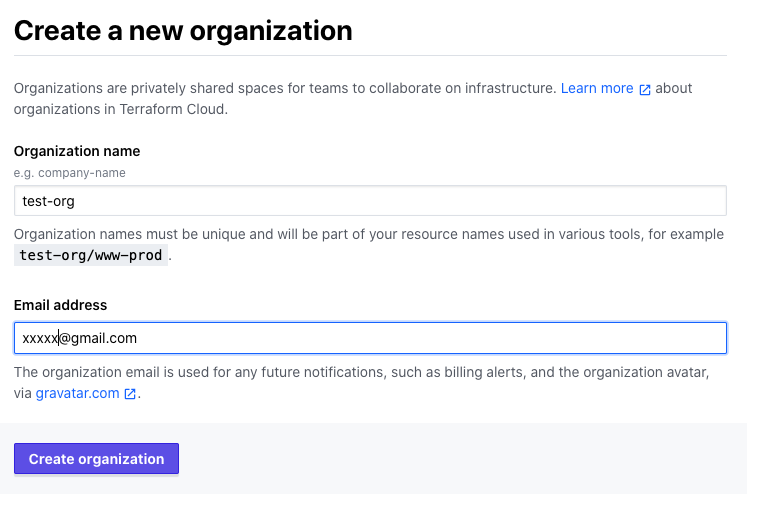
組織作成
管理の大元となる組織を作成します。
組織名は既に誰かに使用されているとエラーとなります。S3のバケット名のようにグローバルに一意な名前で作成してください。
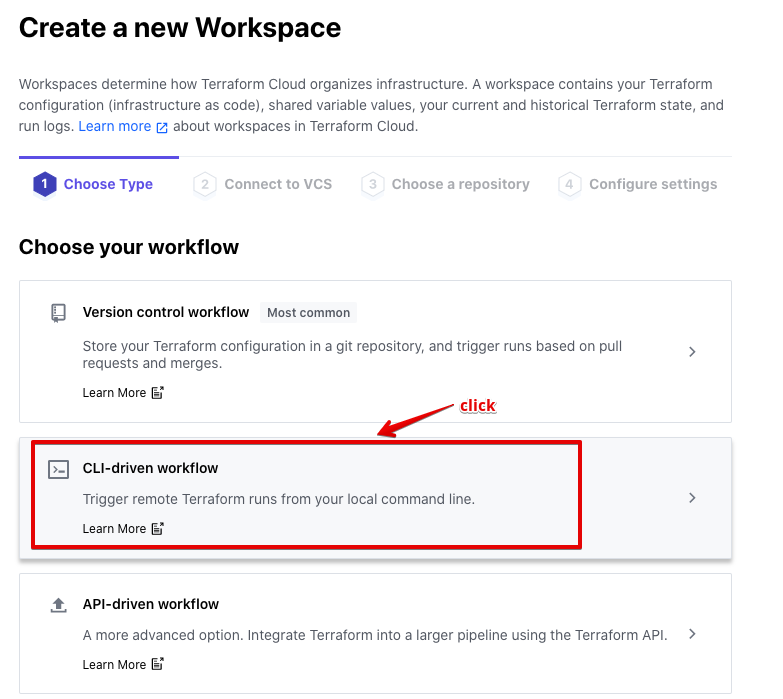
ワークスペース作成
ワークスペース(tfstateを管理する場所)を作成します。
[ CLI-driven workflow ] を選択し、ワークスペース名を入力し、[ Create Workspace ] を押下します。
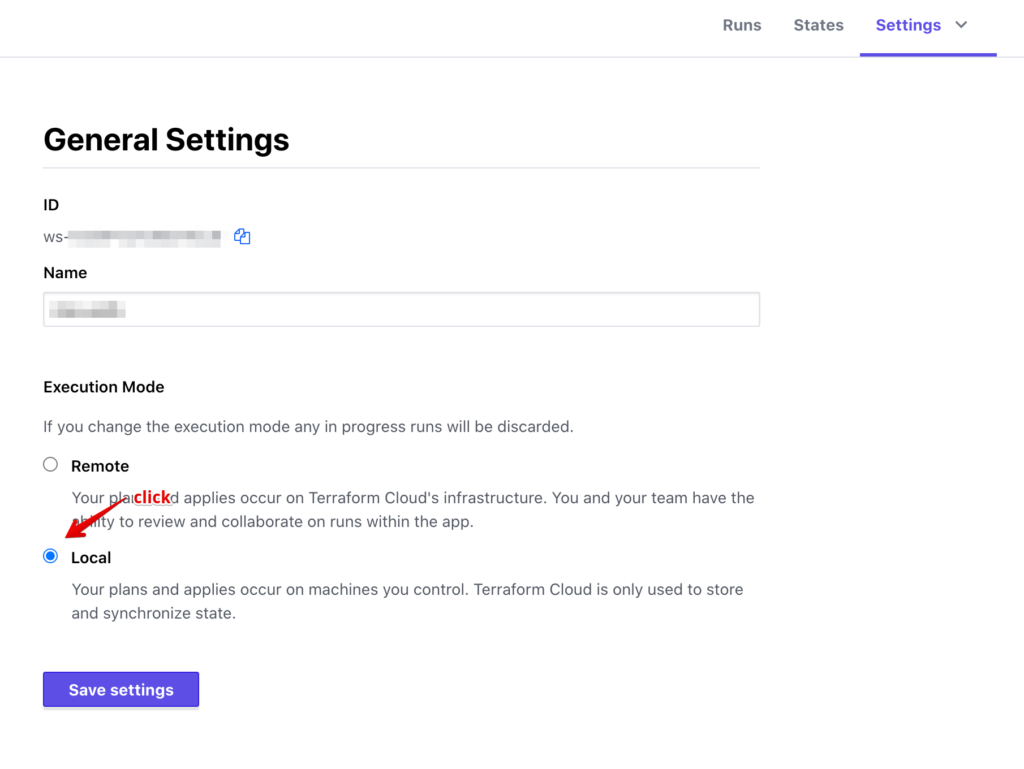
次画面の [ Settings ] タブの [ General ] を選択し、 [ Execution Mode ] で Local を選択します。
デフォルトだとRemote(terraform自体がクラウドで動作する)になっており、ローカル実行時にエラーとなってしまいます。
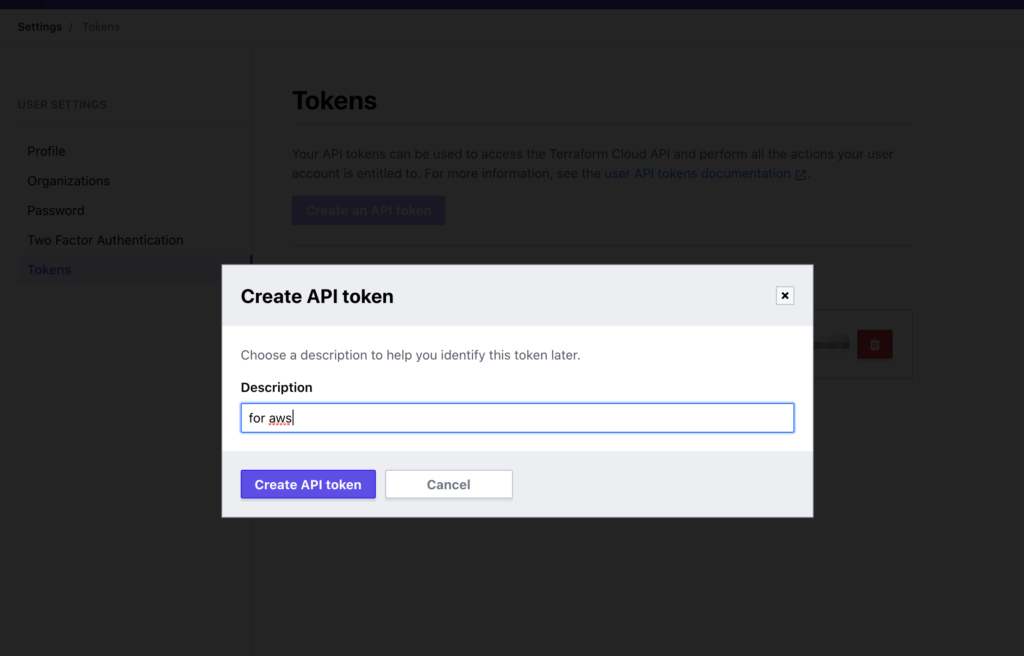
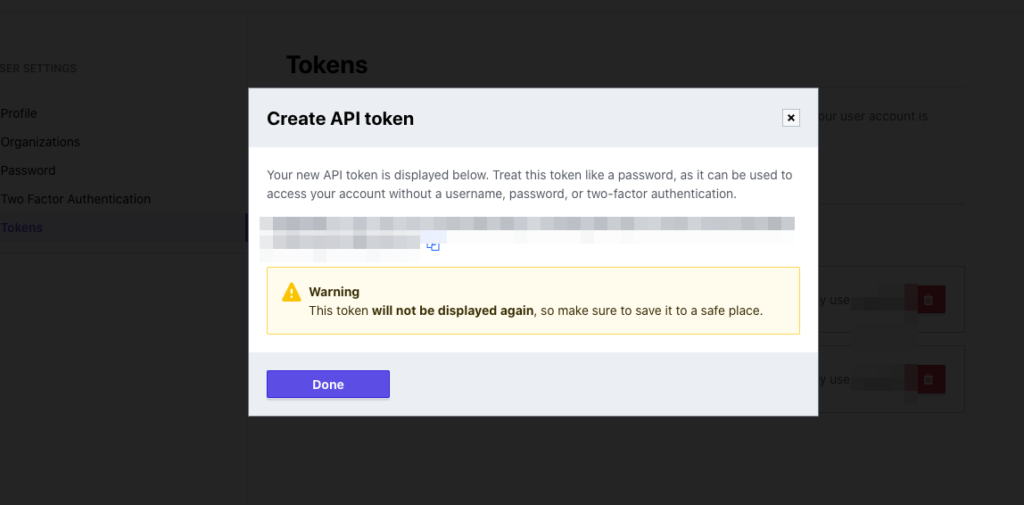
APIトークンの生成
一旦ターミナルへ戻り terraform login コマンドを実行すると、ブラウザへ飛ばされます。
ブラウザでAPIトークンを生成し、それをターミナルに貼り付けてローカルへ保存します。
% terraform login

...

Do you want to proceed?
  Only 'yes' will be accepted to confirm.

  Enter a value: yes          -> yesを入力します。

...


Token for app.terraform.io:
  Enter a value:            -> ブラウザで作成したAPIトークンを貼り付けます。

...

Success! Terraform has obtained and saved an API token.

...
%
なおAPIトークンはホームディレクトリの .terraform.d 配下に credentials.tfrc.json というファイル名に自動的に保存されます。
% ls ~/.terraform.d
checkpoint_cache		checkpoint_signature		credentials.tfrc.json
% cat ~/.terraform.d/credentials.tfrc.json
{
  "credentials": {
    "app.terraform.io": {
      "token": "xxxxxxxx123456789"
    }
  }
}
%またCLI設定ファイルであるterraformrc に記述することもできます。
% cat .terraformrc
credentials "app.terraform.io" {
  token = "xxxxxxxx123456789"
}
%
リモートへ移行
設定ファイルの修正
設定ファイルに terraform ブロックを追加します。
% cat main.tf
## このterraformブロックを追加します。
terraform {
  backend "remote" {
    organization = "test-org"

    workspaces {
      name = "test-work"
    }
  }
}

provider "aws" {
  region = "ap-northeast-1"
  profile = "default"
}

resource "aws_instance" "example" {
  ami           = "ami-0ce107ae7af2e92b5"
  instance_type = "t2.micro"
}
%
initコマンドでリモートへ移行
初期化(initコマンド)を実行すると現在ローカルにある状態情報をリモートへ保存するかどうか聞かれるのでyesを入力します。
% terraform init

Initializing the backend...
Acquiring state lock. This may take a few moments...
Do you want to copy existing state to the new backend?
  Pre-existing state was found while migrating the previous "local" backend to the
  newly configured "remote" backend. No existing state was found in the newly
  configured "remote" backend. Do you want to copy this state to the new "remote"
  backend? Enter "yes" to copy and "no" to start with an empty state.

  Enter a value: yes       -> yesを入力します。


Successfully configured the backend "remote"! Terraform will automatically
use this backend unless the backend configuration changes.

...

%
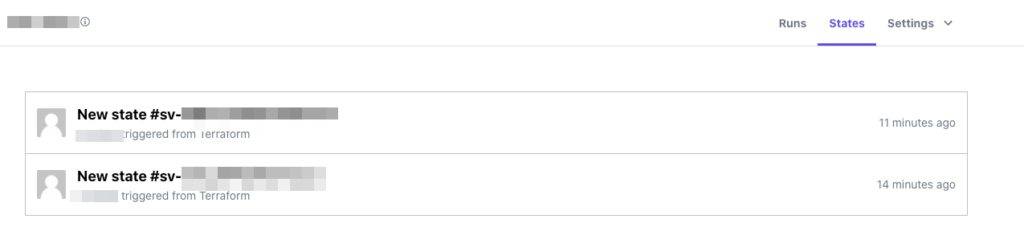
移行後の状態情報の確認
ブラウザで [ States ] タブ を選択すると、新たに状態情報が保存されていることが確認できます。
以降apply コマンドを実行する度に、この履歴が増えていきます。履歴をクリックすると、その時点での状態の詳細、および前回との差分を確認できます。
なおローカルで管理していた terraform.tfstate は空になり、隠しディレクトリ.terraform配下のterraform.tfstateにリモートの設定情報が記載されていることが確認できます。
% ls
main.tf				terraform.tfstate		terraform.tfstate.backup
%
% cat terraform.tfstate
% cat .terraform/terraform.tfstate
{
    "version": 3,
    "serial": 1,
    "lineage": "xxxxxx-xxxxx-xx-xx-xxxxxxx",
    "backend": {
        "type": "remote",
        "config": {
Tips
TerraformCloudアカウント 2段階認証
Terraform CloudはAWSアカウントと同様、QRコードやSMSを使用した2段階認証が利用できます。ぜひ設定しておきましょう。
画面右上部のユーザーアイコン → [ User Settings ] → [ Two Factor Authentication ] より設定できます。
バックエンドの設定ファイルを指定
手順中の説明では main.tf に直接Terraform Cloud の組織名やワークスペースを記述しました。
以下のように別ファイルにバックエンドの情報を記載して、初期化時にそのファイルを引数として指定することもできます。
% cat backend.hcl                   -> backend.hcl はコミットしない
organization = "test-org"
workspaces { name = "test-work" }

%
% terraform init --backend-config=backend.hcl
...
%
Terraform Cloud API でワークスペースを作成する
Terraform Cloud API を使用してワークスペースを作成することもできます。
今回は以上です〜ノシ
参考
ヾ(●>д<)ノThank You
Terraform Cloud and Terraform Enterprise
Sensitive Data in State
CLI Configuration File – Credentials
Terraformの「ここはvariable使えないのか…」となった所